Friday 30 May 2014

PCB layout for ATMega165 for electronic board game

Having designed a number of PCBs for different 64-pin chips, it was with some relief that we printed our latest design onto paper and got a perfect alignment with an ATMega165 chip


Of course, Thursday night is BuildBrighton night, so it didn't take long to get a etched PCB cranked out


Thankfully, the pins and pads lined up just as they did on the printed version (proving that the BuildBrighton laser cutter is, indeed, etching at 100% scale - not 99% or 101%, but bang on actual size!)


With the board etched we needed a way to program the chip before soldering it onto the board (because there wasn't room to add in ICSP headers on the actual PCB).


We decided to make an ICSP programmer using the same pins and pinouts as the ICSP header on a standard Arduino board.


To keep the chance of shorts to a minimum and to aid aligning the chip on the programmer, we took away a lot of the copper away from around the 64 pins.


Because the chip will be placed on the copper-side of the board, we had to solder the through-hole components on the "wrong side" of the board, so that the whole board can be placed on the tabletop without tipping or moving around (some self-adhesive cork on the back helps with this)


However, despite advice to the contrary, we haven't yet been able to compile even the simplest blinky-test project for our ATMega165 chips.

No matter how much we mess about with the boards.txt file, taking unused "boards" (chips) out of the list, and adding in our own descriptors, we simply can't get the ATMega165 to appear in the list of available boards


The nearest we got was to add in a zipped file of arduino-extras and ATMega165 appeared in the list - but trying to compile anything outside of the "standard" chips provided with the Arduino IDE resulted in a compile error and linker messages saying that numerous files could not be found.

Once again the curse of Arduino seems to have struck.
Just like using someone else's library of code, when it works, it works really well.
But when there's a problem, there are a hundred or more posts online describing similar symptoms, and a noticeable lack of solutions.

Steve spent a lot of time playing around and eventually found that an earlier version of the IDE would successfully compile (but was unable to actually upload) some code for the ATMega165. The current version of the Arduino IDE is 1.5 and Steve managed to get version 0.22 to compile code for the 64-pin chips. In the meantime,  I spent some time getting familiar with Atmel's official Atmel Studio 6.

Personally, I think that any desktop application built using .NET belies this by performing incredibly badly. And Atmel Studio is no exception. It's based on the .NET version of Visual Studio. The IDE takes an age to boot up, screen refreshing is slow and it feels worse than an open source app running in a virtual Java machine (cough, Open Office, Inkscrape, cough, GIMP, splutter). It's not a nice experience.

On the plus side, using nothing more than a bit of intuition, I managed to get some code compiling correctly in Atmel Studio 6 in very little time at all.


I spent some time writing my own Oshonsoft-a-like macros, for enabling and reading individual pins on a port - and found I'd recreated something very similar to the bit-level manipulations here: http://www.avrfreaks.net/index.php?name=PNphpBB2&file=viewtopic&p=318198#318198

/*
* bit_functions.h
*
* Created: 30/05/2014 22:05:05
* Author: CHolden
*/

#ifndef BITFUNCTIONS_H_
#define BITFUNCTIONS_H_

#define LOW 0
#define HIGH 1

#define INPUT(port,pin) DDR ## port &= ~(1<<pin)
#define OUTPUT(port,pin) DDR ## port |= (1<<pin)
#define CLEAR(port,pin) PORT ## port &= ~(1<<pin)
#define LOW(port,pin) PORT ## port &= ~(1<<pin)
#define SET(port,pin) PORT ## port |= (1<<pin)
#define HIGH(port,pin) PORT ## port |= (1<<pin)
#define TOGGLE(port,pin) PORT ## port ^= (1<<pin)
#define READ(port,pin) (PIN ## port & (1<<pin))

#endif /* BITFUNCTIONS_H_ */


This allows functions to be used like:

HIGH (B, 4);

to set bit four of PORTB.
Similarly, we can use LOW(C,3) to turn a pin off, and even TOGGLE(A,2) to flip the state of bit two on PORTA.

Of course we could just use bitmasking and write values directly to the PORT values, but somehow, setting and unsetting individual pins just makes the code more readable!

So now we've got a programming board soldered up, and an IDE that can actually compile some code for our ATMega165 chips. We're two-out-of-three steps along the way already: the last step is to get the .hex file from the PC onto the AVR chip via our USBTiny.

Maybe the Arduino IDE doesn't want to play nice. And maybe the Atmel Studio doesn't support USBTiny straight out of the box. But there's always a chance that AVRDude and a few command line parameters might just do the job......


Thursday 29 May 2014

Yes it does

No sooner had I hit "publish" on the last blog post, than a UPS courier knocked on the front door at Nerd Towers. He had with him a massive box.

Considering I'd only bought a few things from Farnell, I presumed there'd been some mistake, or some bizarre doubling-up on an order. After all, I hadn't ordered that much. And I'd only just asked "does it get more ridiculous than this?"

The answer, it seems, is yes.


I tore into the box to see what was in it, before taking the photos. So closed it up to show what had just arrived:


Once more, half a pound of paper stuffed into a box, with a large silver envelope at the bottom. Containing a tray with some chips in it.


Inside the tray were....


6 x atmega165 chips. The fifty pence piece is to show the size of the components sent. These could easily have been fit inside an A5 envelope and sent in the regular post (after all, the label on the box says it was sent via Royal Mail, yet it still arrived via a UPS courier). Farnell do send stuff in envelopes, in the post, mostly. So I really don't understand why I've now got two massive, empty boxes and literally less than a handful of components, which fit in less than one half of one hand!

Farnell packaging - does it get more ridiculous than this?

It's almost a year ago to the day that we noticed Farnell doing something crazy with their postal packaging. Namely going right over the top with it! The other day, in a fit of haste, I ordered some XMega chips and a pcb for programming them.

The PCB is smaller than a credit card and the chips are smaller than a penny piece. They're 10mm square. This is the box that arrived yesterday:


While I appreciate that the box containing the pcb is much larger than the pcb itself, I'm pretty sure all this extra packaging could be removed and a smaller box/envelope used...


The box felt pretty weighty for 4 QFN chips and a small PCB. Inside was....


... a whole heap of padding. And a large silver envelope in the corner. Which contained...


Contents measuring less than the size of a eurocard copper board (160x100mm). And suppliers can send 20 or more of those at a time, in the post, in a padded envelope. What's with all the packaging Farnell? Do you have reams of brown paper and a stack of boxes you need to get rid of?

Wednesday 28 May 2014

ATMega vs XMega

Following an earlier post, where I suggested I'd spent a good few hours redesigning my generic board game sections to use a single, 64-pin QFN packaged chip, with 0.8mm pin pitch (an AVR XMega no less) I recently received a reply via the modern marvel that is G+, in which someone asked why I hadn't considered an ATMega.

Well, because it only has about 28 pins, of course!
But it seems that my relatively small amount of experience with Arduino (and AVR chips in general) has "legged me up" - just like Microchip's PIC microcontroller range, AVR also offer a wide range of their 8-bit micros - some of which come in a 64-pin QFN package, and offer more than the 48 i/o lines available on the XMega I'd identified as a potential replacement.

In fact, the ATMega165 seems like an ideal chip that matches all our previous requirements - with a few extra bonuses to boot. For example, it's already fully supported in the Arduino IDE. No need to learn a new programming environment (AVR Studio) when I can just use tools I'm already familiar with. And it also supports ICSP programming - so I can use my dedicated Arduino/AVR USBTiny ICSP programmer, instead of learning a whole new (two-wire PDI) protocol.

Add in the fact that ATMega165 (and it's relative cousin the ATMega128) are available in volume from AliExpress for about $1.40 each (just over a quid a time) and they're starting to look like real viable alternatives to learning how to use a whole new chipset. (Normally I'd be quite up for this, but right now, I need quick results, not another massive learning curve to tackle!)

The pinout for the ATMega is slightly different to the XMega


It also has fewer "unavailable" pins, fewer power/ground connectors and, even allowing for a dedicated crystal, has up to 54 i/o lines (rather than just 48 available on the XMega). True, it doesn't have as many peripheral devices as the XMega, but for this project, we're just interested in very basic input detection and sending serial data.

In fact, it was only after counting the available i/o on the ATMega that I realised the XMega I'd chosen wasn't actually suitable for what I wanted. Each board game section has 48 input sensors, needs power and ground, preferably pins for a crystal (though these may be omitted if the internal oscillator can auto-calibrate to take any drift out due to temperature etc) but it also needs at least one extra pin for (software, bit-banged) serial data. So I actually need at least 49 i/o pins.

Luckily, the ATMega still has digital i/o pins left over, even after mapping all my hall sensors and the serial data to pads on a PCB. All that remained was to design (yet another) layout for the ATMega128/165


I don't know if I need a crystal, or whether I can get away without one, but it makes sense to at least provide provision for one, should the need arise. The tracks get a bit "cosy" around the bottom left corner of the chip where I've routed a couple of traces out to an external crystal:


But all in all, the whole layout wasn't massively different to the XMega layout, and was designed using just two 0R jumpers to route the serial/power lines over existing traces. Already a massive improvement on the shift-register based design (which had those 6 extra ICs and about ten 0R jumpers).

Reading the datasheet of the AVR has also further simplified the design for this board. Namely, that every digital i/o pin on the ATMega128/165 has a controllable pull-up resistor on it. Which means that there's no need for a pull-up resistor on each of the hall effect sensors on the board. That's made an impressive 48 SMT resistors redundant! Which means we don't have to bother soldering them onto the board - all those potential points of failure eliminated!

Of course, I'll keep the resistor pads in the first/prototype design of the board (after all, how many times have you seen, even in a production circuit board, empty, silkscreen printed component outlines, which indicate something has changed/improved in the design, even after the PCBs have gone out for manufacture?) Even modern LCD TV controllers have un-populated component pads on them, so there's no harm in leaving the resistor pads in place, even if they're not used.

Slowly, slowly, after multiple revisions (only about a third of the designs actually started get finished to the point where I can add them to this blog) it feels like I'm finally closing in on the "proper" design for the generic board game sections. One which is not only cheaper, but also easier, to produce/assemble/manufacture. This design process has felt a bit like carving from a block of stone - we had a working prototype quite a while ago now, but it's through constantly chipping away, shaping and polishing the design that we've gone from a roughed-out shape, to a fully formed object.

Hopefully when I get back to Brighton tomorrow, I can see what the other nerds think and actually make up one or two of these boards and give them a try.

Tuesday 27 May 2014

Major overhaul using an AVR XMega 64 pin QFN microcontroller

Away from home, away from my paints, and unable to mess about with my electronics, with only access to the interwebs to keep amused, I've been thinking about my latest board game design.

Originally we used two PIC microcontrollers, and used through-hole chips, so that the playing surface required only a small gap for the soldered pins (rather than a massive chip getting in the way). Two 28-pin PICs, using up 24 i/o lines on each gave us 48 inputs and worked really well.

The nagging doubt about running serial/UART on two chips with no crystal meant a number of re-designs, before we finally settled on a single microcontroller and no less than six 8-bit shift registers. But with a few days to think about it (and no internet connection on a three-hour train journey, but a PIC microchip database installed on a smartphone) I decided that a far better/easier solution would be a single, 64-pin microcontroller.

We've already created a few working board sections using direct connections to input pins (albeit with two micros instead of just one) so we know it works. And a single 64-pin chip is not much more expensive than a 28-pin DIP/soic version, and removes the need for the extra shift registers.

A quick flip through the PIC microchip database and I found the 16F1526 which seemed like a perfect match. Except for one thing... it's tiny! Below is the board, redesigned for a 64-pin TQFP. After completing the entire redesign, I checked the datasheet for the 16F1526 and found the pin-pitch is not 0.8mm but a tiny 0.5mm between centres!


Any number of PIC datasheets later and I found that all of the 64-pin versions have a pin-pitch of just 0.5mm. Which, in turn, means that the maximum trace size is just 0.25mm (with gaps of 0.25mm between pins). For homebrew etching, we really try to stick to 0.5mm where possible, dropping to 0.38mm where necessary (and as small as 0.3mm where absolutely critical). But 0.25mm just feels like a step too far.


We really needed to find some alternative 64-pin chips with a reasonable 0.8mm pin-pitch. Which, sadly, means leaving PICs behind for this prototype.

As it happens, AVR have produced a range of chips which match exactly what we're looking for. They're called the XMega and they're not pin-compatible with other 8-bit AVR chips (as used on the Arduino boards). They don't even use the Arduino IDE for programming. But they do meet all our criteria!


To make the XMega "modular" AVR have completely redesigned the pin layout (so the pins for the UART are the same on PORTC as they as for PORTD and PORTE, for example). The chip also uses a different programming technique - a two-wire PDI programming interface, rather than the traditional ICSP programming lines. In short, it's a completely new microcontroller.


It was only after re-routing a lot of traces and finding I was a few pins short that I actually took note of the pinout for the XMega. It has a lot more power/ground pins than most microcontrollers, and dedicated programming pins. As I was keen to keep the oscillator pins free for adding a crystal (though this particular chipset does have an auto-calibrating digital oscillator so it may end up being unnnecessary) I counted up just the dedicated i/o pins.

Of the 64 pins available, there are exactly forty-eight i/o lines. Phew!
An hour or so of dragging traces around and I got what looks like a reasonable layout


So that's the layout down, and - in theory at least - everything looks like it should work. All that's needed now is to get hold of one of these chips and have a go at programming it! There's a PCB-based programmer at Farnell for about £25 and the AVR Studio is a free download. I grabbed both, and bought a few chips, so hopefully I'll have everything needed to code up these new chips as soon as I get back to Nerd Towers!

Progress will, as usual, be posted here (although it may be interspersed with other random crap along the way).

Sunday 25 May 2014

Miniature painting revisited

It's been about five months since I last picked up a paintbrush (maybe even longer) and with just a few hours to spare between now and a five-day excursion (one of those return-to-work type meetings spread over two days, plus a Bank Holiday, and an all-day return journey) there isn't really time to do anything meaningful on any of the (many) half-completed projects, so I thought I'd give it a go again.

I've had a few Judge Dredd miniatures on a shelf for a while and they always looked like they would be good fun to paint. With a number of light sources now installed in my workshop/loft, I took my paints upstairs and got comfortable at my new painting station


I always thought I had just a few paints, but after tracking them all down and putting them together in one place, I can understand why The Boss was so pleased to see them gone


There are inks, paints, washes, varnish, any number of different brushes - and miniatures everywhere!
It always takes a little while to get back into painting - to "get your eye in" so to speak - but this time, it was particularly difficult. Mainly because the characters start with a dark base-coat (so there's no point washing the model with ink to create darker shadows, and our Army Painter Strong Tone doesn't really work too well on blue/black/grey colours). But also because - well, there's no nice way to put it - the models are a bit rubbish.


One of the miniatures has a massive great big lump for a shoulder pad. It's completely devoid of detail. It even has what look like tool marks on the exposed sides. It looks like the sculptor got so far and then thought "that'll do" and just left it. Or maybe they hit deadline day and just sent in as far as they had got! The face is also a bit weird - all squashed up and lifted on one side, like the character has had a stroke, and then had it's face slammed in a door.

The actual Judge Dredd character is a little better. As I've not painted for a while, I didn't fancy the thought of shading, blending and those advanced techniques, to get the nice blue-and-green cartoon-y look from the comic strips, so stuck with the simpler colour scheme from the (1995 Sylvester Stallone) movie (although I added green to the pads and boots as an afterthought).


The clenched fist (unpainted in this photo) is still a little lacking, and some details have been painted over flat/plain surfaces, to make it look more intricate than it actually is. The feet in particular were a nightmare to paint, being quite indistinct and unwilling to take either a wash or highlights to define their shape.

In all, it means that I've little enthusiasm to finish the model.
Usually - and particularly when I've not painted for a while - I find it's the model itself that makes you want to finish it, if only to see how the little details come out and whether your paintwork does the model justice. But if the model is slightly disappointing before you start, it's only really likely to be a slightly disappointing miniature once it's been painted up.

I guess I need to find a few half-decent miniatures from this range (I've only got about eight Judge Dredd themed models anyway) and persevere. But as a procrastinator who finds it difficult to get anything actually finished, I almost don't want to start them, knowing the results will only be a bit "meh" even if I do my best!

On my return, we're going to get the new nerd space sorted out in the Boiler Room Studios and make some board game sections, for these miniatures to make an appearance on. It's time to stop painting our tabletop wargames, and to start playing with them!

Friday 23 May 2014

Cascading shift registers for new electronic board design

With our new boards designed, it was a relatively painless task at last night's BuildBrighton's Open Evening to knock out a PCB and mdf top layer for our new layout.

Because our shift registers are cascading, we can actually test (part of) the board by simply soldering on a few parts - the PIC microcontroller, maybe a shift register or two, pull-up resistors and some hall effect sensors.

In fact, so long as we have just one shift register, all the pull-up resistors on that register, and the PIC microcontroller, we can start to test as we go: reading the data in over the SPI lines should, at the first instant, return b11111111 (since all the lines on the shift register inputs are being held high thanks to the pull up resistors). Then as we introduce each hall effect sensor, we can test it's performance, looking for a zero in the incoming data from the shift register, at the point where a magnet is placed over the sensor. Once we've tested one shift register, we can simply add the next one "higher up the chain" and repeat - allowing us to test each individual component as it is added to the board.

This may seem like a slow, long-winded way to test our new board design, but - in the event of a problem - it will also allow us to immediately identify any offending component as soon as it is added to the board: a really useful thing to be able to do on a first-time prototype!

Of course, we're fully expecting everything to just work, first time, with no cock-ups, oversights or mistakes. And if, by some miracle, it does, then we've already got our artwork prepared for making a silkscreen for screen printing.

We're finally happy with our chosen board design - the entirely surface mount approach means that we don't have to worry about constructing a tray or enclosure for the lower-half of each board section. We don't have to worry about drilling the board and getting the pcb design to line up perfectly with the holds. And using this new design means that the underside of our single-sided copper board is simply the bottom of each board section. Keeping the design single-sided also means we're more than capable of producing a reasonable volume of boards ourselves (rather than get double-sided boards professionally manufactured) relatively quickly and we can produce more on demand, as the need arises.

We've had an ingenious idea for a semi-automated pick-n-place machine (more on this in a later post) so all that remains is to sort out the top/mdf layer for each board section. At the minute, we're laser cutting the top layers from 3mm mdf


This is actually quite a slow process. Although the laser cutting only takes 3-4 minutes, this does mean that to make any kind of volume of boards limits us to about twenty per hour.


And to produce 20 mdf layers in an hour means that the laser cutter is going to be working flat out, without a break. That's going to have a serious impact on the laser tube; and it's quite likely that we're not going to be able to keep that rate going for very long, as the tube gets hot and the cooling water needs chance to cool down.


While our new layout for the top layer fits our shift-register-based board really well, and the recesses for the 3-pin connects make the edges look nice and neat, we're going to have to consider an alternative to laser cutting sheets of mdf - both in terms of speed and appearance.


We're also going to need to consider using a slightly thicker material than 3mm - even if just by 1mm or so - because of our surface mounted crystals. They protrude ever-so-slightly over the lip of the laser cut mdf, when placed on the pcb.


While it is possible to source alternative/lower profile crystals, this also adds to both the cost and availability of sourcing our components - where possible we're trying to stick to easily sourced parts. We could also stick with our 3mm thick top layer and introduce a pocket on the underside of the graphic layer, but this is just complicating things unnecessarily. Better to just stick to a slightly thicker layer, and make sure that all components are completely covered by it, when it is in place.

Foam board is a relatively inexpensive material for making our top layers.
It's not only cheap, but easy to cut (the laser cutter can be run at a faster speed than mdf and still get a decent cut). It's also readily available from  a number of sources, and comes in both 3mm and 5mm thicknesses.

Hindleys, for example, sell a pack of 10 sheets of 508mmx762mm foam board for £21.45
Since our board section is 200 x 150, we can get 9 pieces per sheet, or 90 board section pieces for £21.45. Even allowing for VAT at 20% this works out at less than 30p per board section. Not at all bad!


It may also be possible to die cut. And it's this reason why we're giving it some serious thought: to be able to punch out the outline and all the internal holes with a single stroke would be a very quick way to produce this top layer for our board game sections. Of course we'd either need to build a die cutting punch, or pay for a cutting service (on top of a one-off charge to get the die made) but it does offer up an intriguing method of producing a relatively large volume of pieces, very quickly.

For now we'll keep that idea on the back-burner: we've a PCB to finish soldering up and some testing to do first!

Wednesday 21 May 2014

New PCB designs for electronic board game

A while back we got a working prototype of our electronic board game, in the form of a "set-in-space-dungeon-crawler". It worked quite nicely, but as we talked to other tabletop gamers, it became apparent that a generic gaming system would have a much wider appeal (not everyone is a sci-fi/Warhammer 40K fan!)

So we set about making a series of generic 6x8 board sections, which could be arranged in any number of ways: in a 3x2 arrangement to create a playing surface 12 x 24 squares in size (perfect for a football/sports pitch, meaning we're eventually getting close to creating our electronic Blood Bowl game that was started so many years ago!) or even a 6x1 arrangement, to create a big long 8 x 36 grid which could be used as a Wild West town, complete with model buildings along each long edge.

Our original design used two 16F883 PIC microcontrollers, each with 28 pins. Allowing for power, ground and data lines, this gives us 24 i/o pins on each mcu, for a total of 48 for each 6x8 board section.

Now we're using software serial (bit-banging) for data transfer, and the internal oscillator on the chip, running at 8Mhz. During testing, everything has worked fine. But there's just a nagging feeling that this might not be quite good enough for a production board: in the past we've had problems with software serial on a 16F628 running on its own internal oscillator - after a few minutes (and particularly if the chip is face down on the table with no ventilation, so the ambient temperature can rise over time) the bits of data can drift, giving inaccurate readings.

When we had problems like this in the past, they were fixed quite easily by adding a crystal to the mcu. But we don't have any spare pins to add a crystal to each mcu on our board sections - all our pins are used for i/o lines!

The answer?
PISO shift registers!

The 74HC165 is a parallel in serial out (PISO) shift register. It can be used with similar shift registers, and they can all share the same clock and latching lines, while the data can be cascaded from one shift register to the next.


After four or five attempts, we've finally got a board design that
a) we're happy with
b) uses only surface mount parts (so the back of each board section is completely flat and requires no additional enclosure to be built around the pcb)


We're using the original connector idea, only this time we need only three pins. In our earlier version, we used five pins, so that each socket was symmetrical (a mirror image on both sides) which allowed the different board sections to be placed in any orientation. To keep things simple, with this design, we're going to force all boards to be placed the same way around - the easiest way to achieve this is to place the connectors slightly off centre. Once we know that boards can only be connected a certain way around, we don't need the extra pins and can keep the connectors down to just 3 pins, instead of five.


Of course, a new board layout means a new mdf laser cutting template, with extra holes for all those shift registers:


With these designs complete, we're ready for the next BuildBrighton open evening, to have a go at laser etching the board(s) and laser cutting the mdf, to give this new design a trial run. If all goes well, we might even make this the first design that we have a go at screen printing, once we've got our new space at the Boiler Room Studios up and running!

Relay timer controller for 240v main with a PIC, max7219 and 4-way 7 segment display

This is a simple timer/relay controller; it's for our UV exposure unit, but could easily be used as a countdown timer to switch any 240v mains load (up to 5A or 10A depending on the type of relay used).

The idea behind it is pretty simple - the interface consists of four buttons and a 4-way 7-segment display. Two of the buttons are for minutes and seconds, the other two buttons are for up/down (plus/minus). Hold down the appropriate minute or hour button, and press the plus/minus buttons to increase/decrease the amount of time on the display.

While the display is showing a time, the relay is activated and the 240v mains load is switched on. Every second, the time decreases. When the time reads zero, the relay is released, and the 240v load is switched off.


We did consider having a large "go" button but eventually decided it was unnecessary. As long as the time on the display is above zero, the relay will activate and switch on the mains 240v load. So as soon as you start to enter a time, the relay will switch on our UV lamps, for example. As soon as you release both the hours and minutes button for more than one second (to indicate that the time has been set) the countdown timer begins.

While this does mean that the timer is on for maybe a few seconds more than actually shown on the screen (if you spend 5 seconds setting the time to 2min 30sec, for example, the unit is actually activated for 2m 35 seconds) it also means we have an important fail-safe for our UV exposure box - namely that we can't end up with a scenario where the UV lamps are switched on and the countdown timer is not running (which could, potentially, lead to massive over-exposure of our UV sensitive paints).

We're quite happy - for this project at least - to compromise a little accuracy for ease-of-use and to simplify the hardware design slightly.

Friday 16 May 2014

Creating a screen printing UV exposure unit from acrylic nail art lamps

Some of the nerds have recently acquired space at the Boiler Room Studios in Hove - somewhere big enough to do some soldering, laser cutting, and - hopefully - some screen printing!

At the heart of any screen printing is a UV exposure unit. This allows an image (whether hand-drawn, printed, or photocopied) to be transferred onto the silkscreen for printing. By applying a photo-sensitive film to the screen, and using the image as a photo-resist (similar to how we use car paint as an etching mask for our PCBs) the UV exposure unit creates a hard, thin stencil on the silkscreen.

As well as using ultra-violet light to create an image on a screen for silkscreen printing, it will also be really useful for exposing and hardening off UV curable solder-mask paint. So we get two different uses from the same bit of kit!

In our new studio space we have a large office desk, which forms the base of our screen-printing exposure unit. Simply put, we're cutting an A3 sized hole into the desktop (in the larger, left-hand side of the desk) and covering this with glass. Under this glass, we'll have a tray holding a number of ultra-violet (UV) lights.


 In fact, we'll probably add a few plain while bulbs (or maybe some LEDs) and the whole thing could also be used as a lightbox to help with alignment and for tracing images. A real three-in-one-bit of kit!

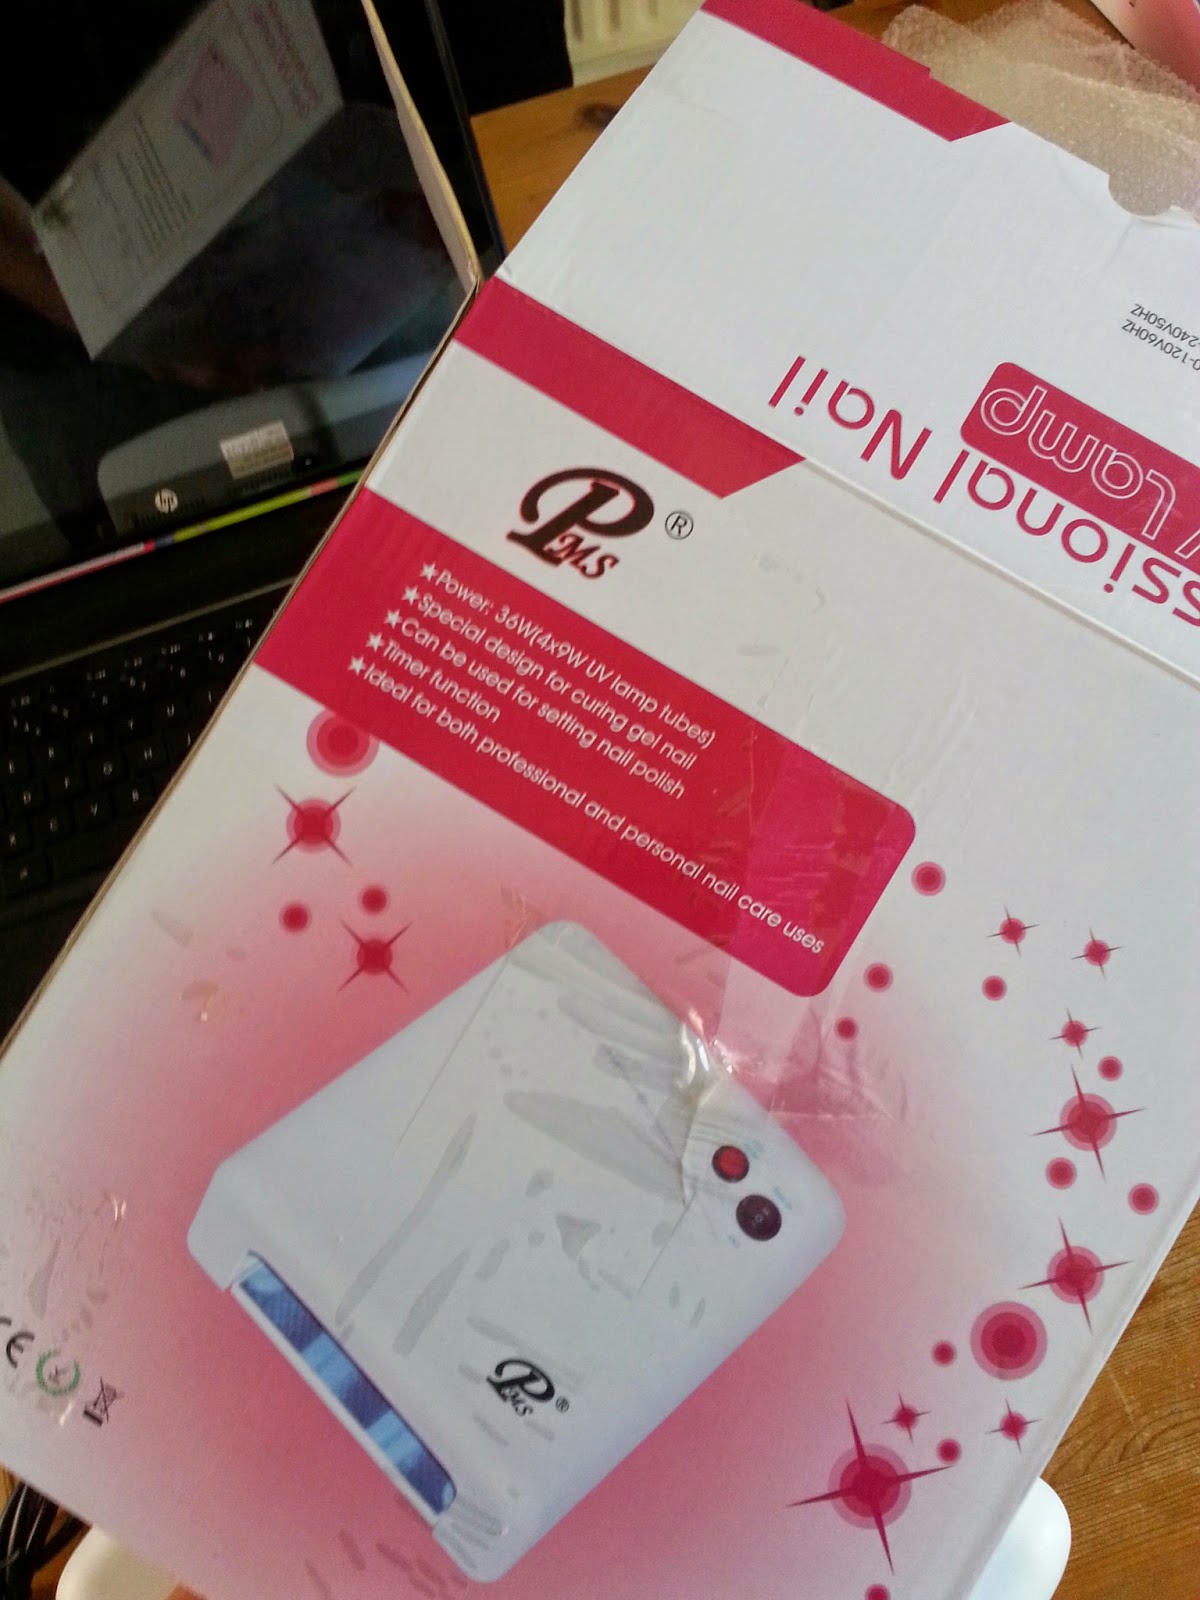
We've read reports of people having success using acrylic nail "drying" lamps for photo-resist processing, as each unit has four 9W flourescent UV bulbs - removing the need to create complex balast-balanced circuits to get a bare UN bulb to light up. As they cost about a tenner each on eBay, and because we're aiming for a larger-than-A4 exposing area, we bought three.


They're pretty simple devices, which means they'll be easily hackable! Each one has a timer button, which runs the lamps for 2 minutes (120 seconds) exactly. They also have a flick-switch to make them always on. The units are surprisingly large. The photos on the internet don't really have much to give an indication as to their actual size. For some reason (maybe the price) we were expecting them to be physically smaller.


Each unit comes with 4 x 9W UV bulbs, marked as 365nM (although the instructions specifically say that the UV light is safe to look at, but recommends avoiding prolonged exposure to the eyes) has a removeable bottom plate and a cheap, plastic enclosure.


A few screws hold the top and bottom parts together. After opening, care needs to be taken in case the wires connecting the base to the lid are snagged (some of the wires were wrapped around each other on this unit).


The components on the lid are simply a push-button switch and a toggle switch, which can easily be re-sited elsewhere. The lamp holders are part of the moulded plastic enclosure and are not removeable - we're going to need to cut the lamp holder parts out of the plastic to keep them intact and make them reuseable.


As we have three of these, to make a single UV exposure unit, the centre-pole and the "always on" pole of the toggle switch can be shorted together (so each device is always switched on when plugged in) and the 120 second start button simply unplugged from the board. We're powering all three from the same single power supply (a single lead with a 240v mains plug), but keeping the individual fuse on each unit, just in case.

This single power supply will be switched via a relay, which allows us to create a PIC-based timer module to set the exposure time (for all 12 lamps together) in minutes and seconds, rather than have to switch each bank of 4 lamps individually.

We've already built a timer module (for an earlier LED-based UV exposure unit which worked, but was not very big) but that's slightly more than we need for this project. A simple relay switch with 7-segment countdown timer should suffice for this, since we're only having the one setting (full power). Which means we need to get all three of our individual units working from a single power supply.

The first job is to make a tray into which we can mount our UV bulbs and electronics. At BuildBrighton, this means grabbing the first bit of left-over sheet ply and some 1" x 2" battens and knocking together a simple tray.


We made sure that the height of the sides is high enough for the height of the UV lamp holders, chopped up some strips of pine that were lying around and screwed the whole thing together (no nails were harmed in the making of this wooden tray!).

Next, we needed to get the UV controllers out of the nail drying units. UV flourescent bulbs are not as straightforward as regular lamps or LEDs - you can't just put power to them and expect them to switch on. Each bulb needs complicated ballast control and to be balanced properly, so we just lifted the circuitry that came with the nail drying machines out of the enclosure and made a few simple modifications.


After putting a probe on the 3-way switch (with the unit unplugged from the mains of course!) we discovered that in the middle (off) position the  incoming (blue) neutral line is disconnected, and it simply shorts this to either the orange wire (always-on mode) or the black (120 second timer mode) as the switch is toggled.


Since we're going to control the on/off times of the entire unit (once it's built) we removed the switch and shorted the incoming "neutral" line from the 240V to the orange wire (so that the device acts as if it is in the always-on position). The other part shown in the photo above (connected to the incoming, brown "live" wire) is a fuse holder with a 3A quick-blow fuse fitted. We decided to keep this in place as an extra safety precaution (messing about with 240V mains can be both scary and dangerous, so always treat it with respect!)

One problem with the nail units is the use of cheap, vac-formed lamp holders, integrated into the large white housing. Grumpy Paul showed how to cut these free properly - not just going at them with a hacksaw as originally proposed, but to score around each lamp holder with a sharp blade, and them snapping them free from the surrounding material.


To make sure we were along the right tracks, we connected just two (of the three) modified devices together, using a bank of screw terminals fixed to some strip/vero board, and fired it up....


Success! All eight bulbs lit up first time. Things already look very promising! By simply repeating the whole process for the third and final nail drying unit, we got all 12 bulbs connected and running from a single 240V power supply:


Now for some quick maths: each bulb is rated at 9W (these are flourescent bulbs after all, which are much less power-hungry than traditional tungsten filament bulbs). So we have 12 x 9W = 108W (plus perhaps a few mW for the logic control on each of the boards which is insignificant in the grand scheme of things). Not much more than a single, bright, filament-based light-bulb.

Since power = current * voltage, we can re-arrange this formula to get current = power / voltage. Which means our unit is likely to draw 108/240 = 0.45 amps.

Even using the single plug from just one of the units, and a single fuse for the entire set of three controllers, we're well under the 3A rating of the quick-blow fuse (and the fuse in the mains plug). So no further modification is required - we should be just fine running our new UV exposure unit from a single socket, exactly as it it (ok, maybe we need to reposition a few of those lamps!)

Being able to switch the entire set of UV bulbs on and off from a singe power source means we can now get on with building our own PIC-controlled timer/relay unit, two switch the entire thing on and off, and allow us to set an exposure time to the nearest second. Perhaps that's for another post......